Are you ready to dive into the world of Palworld with your own dedicated server?
Setting up a dedicated server for Palworld can seem daunting, but fear not! I’m here to guide you through each step, ensuring a smooth and straightforward process. Let’s get started!
Setting Up Your Palworld Dedicated Server
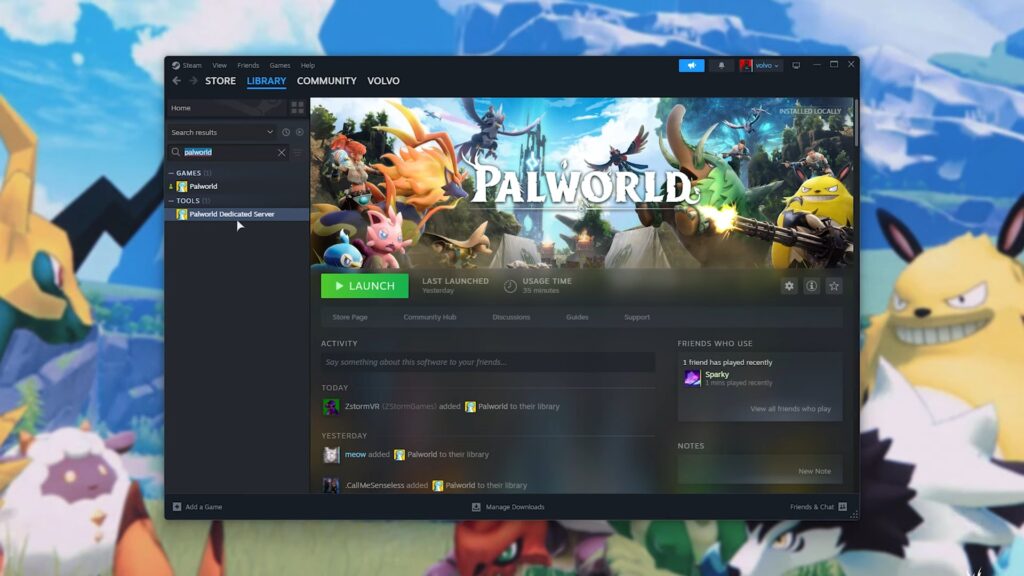
First things first, you’ll need to download Palworld Dedicated Server from Steam.
It’s a straightforward process: search for Palworld in your library, find “Palworld Dedicated Server” in the list, download it, and install it.
Configuring Your Palworld Dedicated Server
Once “Palworld Dedicated Server” is installed, navigate to the server files. Right-click on Palworld in your Steam library, select ‘Manage,’ and then ‘Browse Local Files.’ You’ll see all the necessary files for your server here.
You’ll need to edit the ‘Default Palworld Settings’ file using a text editor like Notepad or Sublime Text. Copy everything from the opening bracket to the last line.
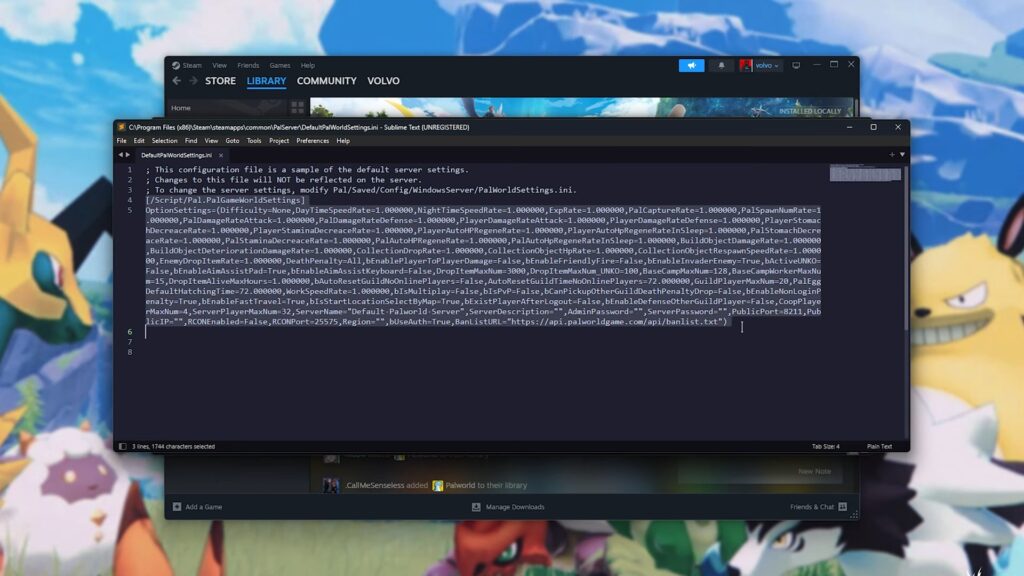
Then, paste this into the ‘Palworld Settings.ini’ file in the ‘Pal Saved Config Windows Server’ folder. Make sure to personalize settings like server name, description, and admin password.
Launching the Server
To launch the server, open Steam, then locate Palworld Dedicated Server in your Library again. Next, right-click on Palworld Dedicated Server in Steam, go to ‘Properties,’ and paste a set of launch options.
Customize these options based on your server settings from the previous process.
-ServerName="Enter Server Name" -port=8211 -players=32 -log -nosteam -useperfthreads -NoAsyncLoadingThread -UseMultithreadForDS EpicApp=PalServer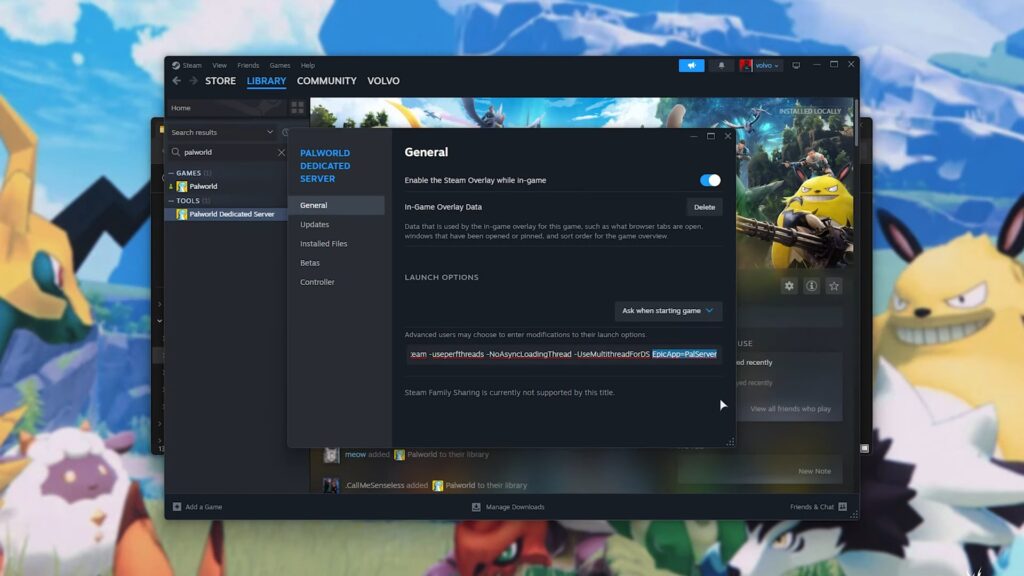
In case you want to launch a private server instead, you can remove the last part of the launch options leaving you with:
-ServerName="Enter Server Name" -port=8211 -players=32 -log -nosteam -useperfthreads -NoAsyncLoadingThread -UseMultithreadForDSOnce done, you can now click launch on Palworld Dedicated Server. You’ll know it’s running when it shows a pop up like the one below. As long as the window is open, it means that your Palworld Server is up and running.
Configure Firewall and Port Forwarding
To allow others to join your server, you need to configure your firewall and port forward. Here’s a quick rundown:
Configure Firewall: Use Windows PowerShell to allow specific ports through your firewall. Open PowerShell as administrator then paste the below and click enter a few times to make sure the codes run through.
New-NetFirewallRule -DisplayName "Palworld Server" -Direction Inbound -LocalPort 27015,27016,25575 -Protocol TCP -Action Allow

New-NetFirewallRule -DisplayName "Palworld Server" -Direction Outbound -LocalPort 27015,27016,25575 -Protocol TCP -Action Allow

New-NetFirewallRule -DisplayName "Palworld Server" -Direction Outbound -LocalPort 8211,27015,27016,25575 -Protocol UDP -Action Allow

New-NetFirewallRule -DisplayName "Palworld Server" -Direction Inbound -LocalPort 8211,27015,27016,25575 -Protocol UDP -Action Allow
After that, locate your local IP address by entering ‘ipconfig’ in PowerShell and locate IPv4 address.
Configure Port Forwarding: This is crucial for allowing players from the internet to join your server. You’ll need to forward certain ports (like 8211, 27015-27016, and 25575) to your PC’s local IP address in your router settings.
Note: This may differ from different routers. Generally, you’d want to locate the Port Forwarding settings in your router settings.
Join the Palworld Dedicated Server
Now you can launch Palworld and click “Join Multiplayer Game.”
If you’re joining from the same PC, use the IP address 127.0.0.1 followed by the port number in the Palword Dedicated Server application.
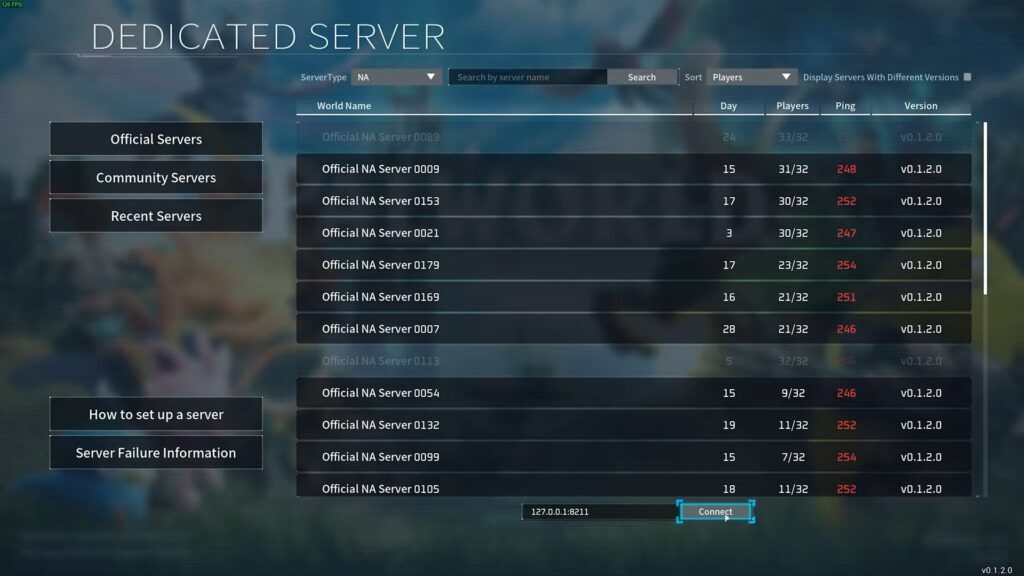
For others to join, they’ll need your external IP and the port number. For your friends to join, they’ll need your external IP address.
You can find this easily by searching “What is my IP address” on Google. Share this IP with them, and they can connect to your server using your external IP followed by “:8211.”
Running and Saving Your Server
To properly save and close your server, you’ll need to use the in-game chat.
To do this, type command ‘/AdminPassword YourPasswordHere’ and hit enter. Next, type chat command /Save to save your server.
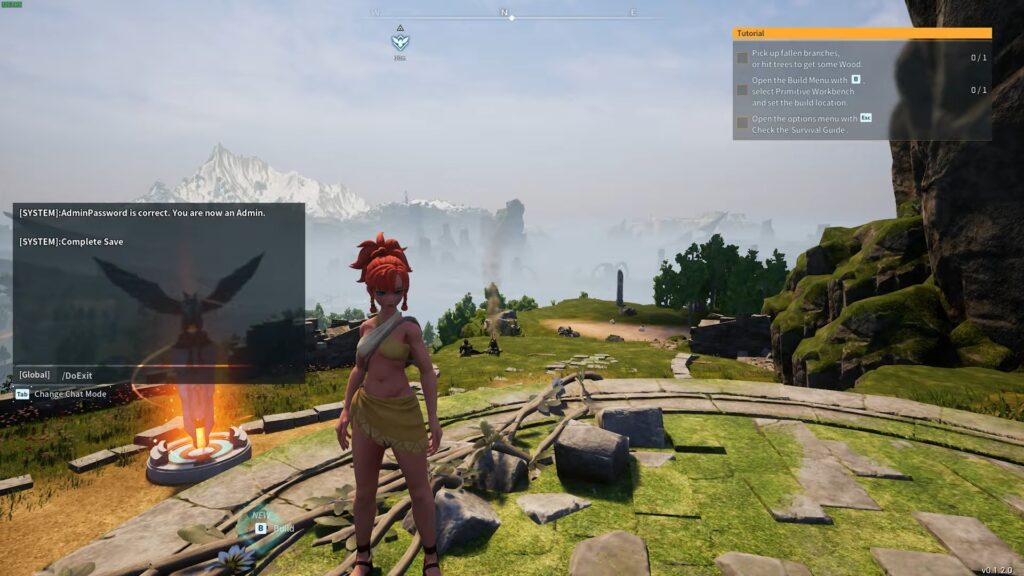
This ensures that your progress is saved correctly. If you would like to close the server, type ‘/DoExit.’ If done correctly, the pop-up from earlier will now close and you will now disconnect to the server.
Remember, your external IP is like your digital home address. Only share it with friends you trust, as you wouldn’t want it falling into the wrong hands. And there you have it!
With these steps, you should have your Palworld multiplayer server up and running. Enjoy exploring, battling, and crafting with friends in your own Palworld adventure.


The only guide that makes sense so far since all these Youtube click-baiters are editing the “DefaultPalWorldSettings.ini” directly without renaming and copying it into the correct folder. Also the only guide who is doing the port stuff correctly.
Good job and thanks for sharing!
Glad I could help!